I do not claim to be a landscape photography expert necessarily but I have been doing this a while and I have learned some things over the years. As with anything we learn through our mistakes and these are some of the common landscape photography mistakes that not only beginners make!
Of course, this list of common mistakes isn’t comprehensive and doesn’t pretend to be! There are always plenty more mistakes to be made but it’s through mistakes we learn!
No clear subject
Composition is key! I could say many things about composition but possibly the most important thing to do is make sure that your images have clear subjects. This subject could be whatever you want, be it a building, a mountain, a rock, etc. but make sure it is there. When taking a photo we should be asking what about a particular scene caught our eye and is this image being framed in such a way that our eyes are instinctively drawn towards whatever it is that caught our eye? The subject should be obvious to the viewer of the photograph without needing to be pointed out.
Sometimes there is just too much going on in a scene and this risks the viewer not knowing where to look. Often less is more and it is worth isolating a particular part of that scene and making the photo about that. Better to have several photos of different interesting compositions than one photo that in trying to do too much, fails to do anything well.
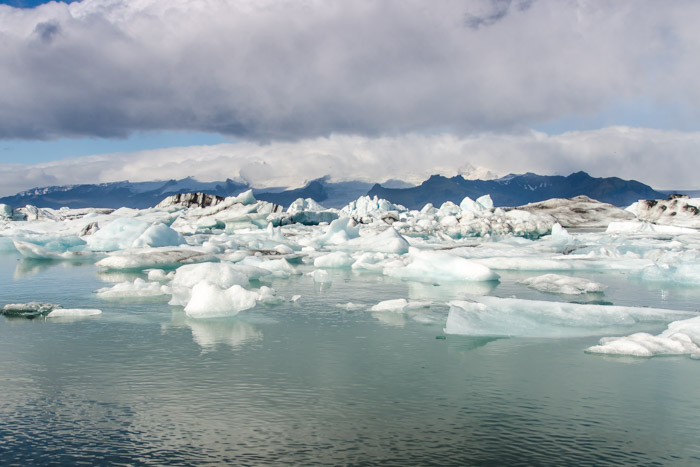
Even though this is a very good spot for some landscape photography, the subject of this photo is a bit unclear with no clear foreground interest. There is just too much going on in the mid-ground/ background.
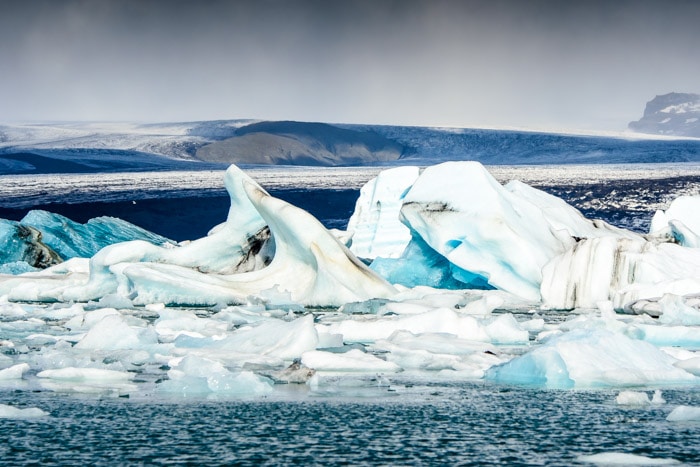
By zooming in and isolating a couple of ice formations they clearly stand out and work better as a clear subject of this photo. Much better don’t you think?
Rushing
Take your time. Landscape photography should be relaxing and this means that the split-second reflexes sometimes required in photographing sports or wildlife are not so important. Sure, light can change in an instant in some cases but generally, you will have more time to take a landscape photo which means plenty of time to get things just right. Sure, a lot can be fixed in post-processing but you might as well make things easy for yourself by getting things as right as possible in camera. This means that adjusting the exposure, slight changes to the composition, making sure the photo is sharp, etc. The majority of the time there isn’t (or perhaps shouldn’t!) be a rush! One great photo is better than 10 mediocre ones. Use a tripod if you have one and are shooting in low light…perhaps use one even if the light is bright enough not to. This forces you to slow down and pay more attention to what you’re really shooting.
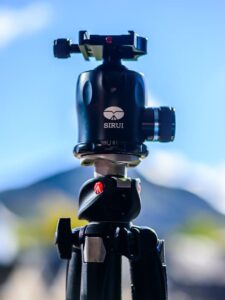
Tripod avoidance
Speaking of tripods…not using a tripod in situations that require one is a recipe for disaster. Buy a good one. I don’t necessarily mean the most expensive one you can find (and believe me, they can get expensive!) but you want one that is steady. If it isn’t then you’re not much better off than hand-holding the camera. This means probably not one that you can buy for £10-15 if you want to use it seriously.
The old adage “buy cheap and pay dear” certainly applies here.
Some might disagree with me about what I say next but when deciding if it’s worth paying more for carbon fibre tripod legs then the answer isn’t definitely one way or another. Carbon fibre is lighter…much lighter, but you want a tripod to be stable and this means the heavier aluminium tripods perhaps have an edge. Sure – you can hang weights (such as a camera bag) off of a tripod to weigh a carbon fibre tripod down if it gets windy but taking a heavier tripod means this isn’t necessary and if things get really gale-force your images will certainly appreciate that extra weight of the tripod. Also, metal tripods are significantly cheaper and that money can perhaps be better used elsewhere.
Some people say that carbon fibre might resonate less but whether this makes a difference or not is arguable. There’s also the added bonus of the extra exercise you get from lugging a heavier tripod around and exercise is always something that is hard to make time for when working full time!
***QUICK TIP*** Use a timer or remote if you’re using a tripod to minimise the risk of shaking the camera when pressing the shutter button. If you’re a perfectionist and your camera has a ‘Mirror Up’ function (DSLRs) you may want to use it. This will require two clicks of the shutter/ remote to take a photo but minimises the risk of the camera moving when the mirror moves upwards (as happens when a photo is taken).
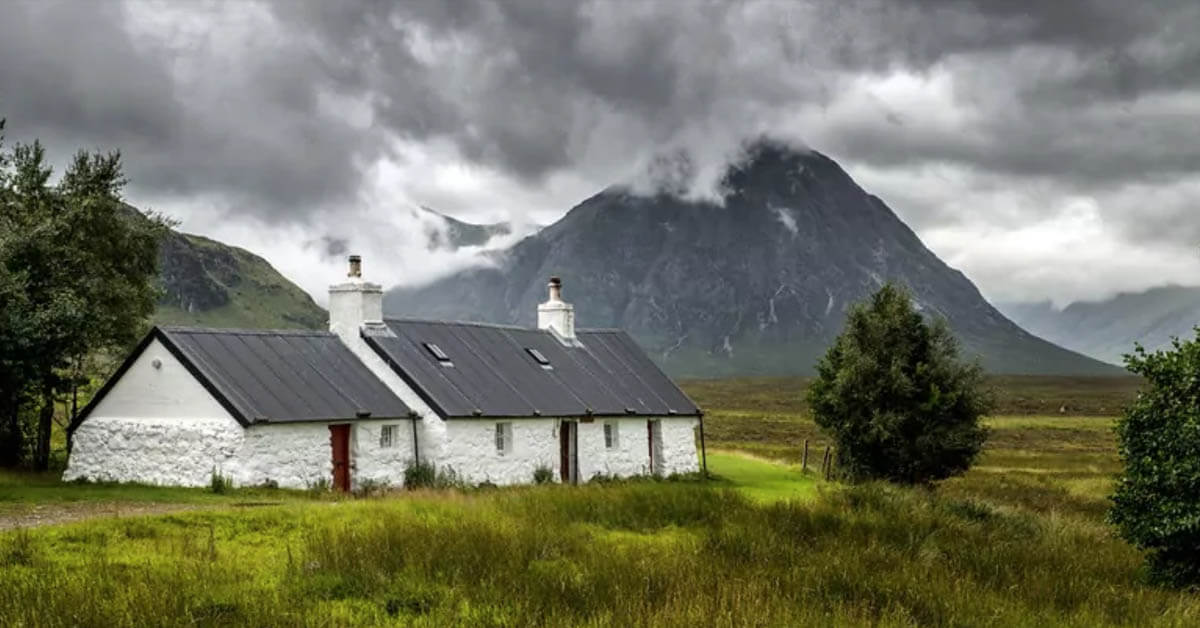
Good weather does not necessarily equal good photography
Of course, bad weather does not always equal good photography either. Perhaps worst of all, in my opinion, is a flat grey sky. Flat grey is not good for landscapes, however you look at it. You could argue it forces you to focus on smaller elements of the landscape and isolate these rather than using a wider shot. However, I prefer weather that isn’t limiting in this way.
A bright blue sky is also not ideal. During the middle of the day when the sun is high in the sky, this leaves harsh shadows and in my opinion a lack of interest. You really need some clouds to make a good sky, whether in the dawn or dusk to bring colour into the sky or during the day to add some mood to the scene.

Horizons not being level
Make sure the horizon is level! Simple tip but so often not done. However, a horizon that isn’t level is horribly distracting. A couple of degrees makes all the difference! Compare the level one (left) vs the squint one (right)!
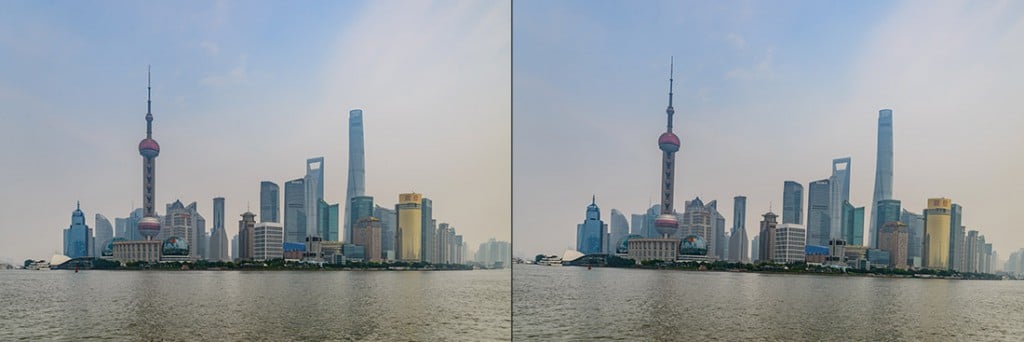
There are a number of ways in which you can make sure the horizon is level, make sure you do at least one of these!
Lack of variety
There’s no point doing the same thing all the time, whether this means locations or photography techniques. Mix it up! Don’t shoot everything in landscape format in the camera’s original aspect ratio. Just because it’s landscape photography doesn’t mean it has to be err… landscape format (if you catch my drift)! Portrait (i.e. vertical orientation) works much better for certain scenes. Changing the aspect ratio from the standard (2×3/’4×6′) really helps some compositions too. Some shots work better as a square (a la Instagram) format, others a 5×4 or 4×3 or perhaps a wider panorama shot.


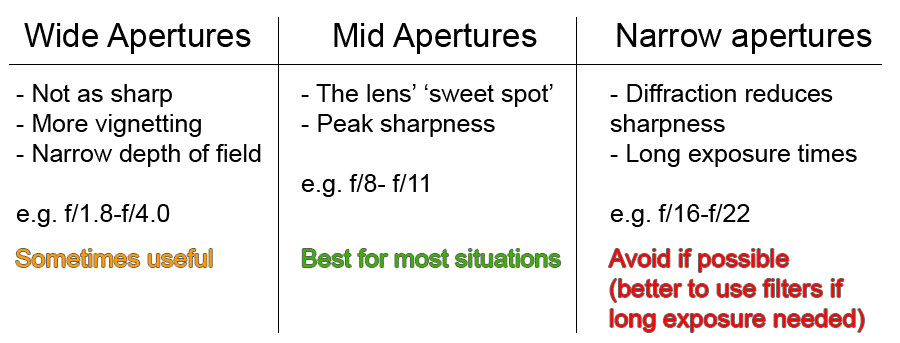
Narrow depth of field
Good in some cases, but in landscape photography, a narrow depth of field is not your friend. This applies most of the time at least. Generally, with landscape photography, you want as much of the scene in focus as possible. You should ideally avoid apertures at both extremes. A large aperture (low f-number such as f/2.8) will result in the focus point being sharp but foreground/background being blurred and this isn’t what you want generally. A small aperture (high f-number such as f/22) causes the image to lose sharpness due to diffraction.
For the majority of purposes, it is best to use a medium aperture – perhaps f/8 to f/11. This provides a good balance of providing a wide depth of field while not making the shutter speed too long or losing sharpness from diffraction.
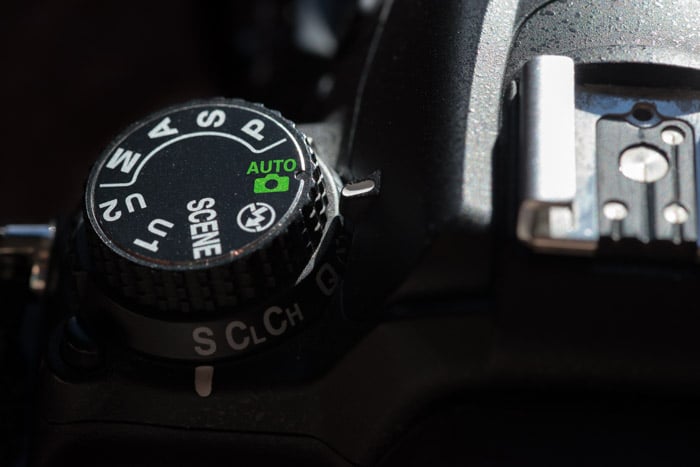
Using the ‘Auto’ mode
I think this is one of the areas in which budding photographers can really do themselves a disservice. By letting the camera do all the thinking you deny yourself the chance to improve and to really understand what works and what doesn’t.
Most cameras will have other modes with at least some degree of manual controls (even phone cameras do these days) and it is worth trying them out. Cameras might be getting smarter these days but they’re still not perfect and hopefully, you as the photographer should be smarter! The camera doesn’t truly know what we’re taking a photo of or what our idea of the scene is. This also prevents the situation of the flash firing/ popping up when you don’t want it. It’s very unlikely (read: impossible) that you will illuminate a distant mountain/landscape with your camera’s pop-up flash so having the flash fire can look a bit silly (besides wasting battery). Avoiding the camera’s auto setting avoids this photography faux-pas.
Besides, my camera (and a lot of the more professional DSLRs) don’t even have an ‘Auto’ setting!
Always taking photos from eye level
Why? Again, variety is good! I once read that the mark of a good photographer is that you can’t tell how tall they are from their photos. An odd way of phrasing it perhaps but it gets the message across. Get down low to the ground or climb up high to get that unique perspective that gives your shot that little bit of difference or drama.
Always using a wide lens
Wide lenses and landscapes are not synonymous. It is not necessary to always attempt to include half the known universe in your shot by using a 10mm focal length or similar. Using a longer lens (even a telephoto) can help to isolate key interesting elements in the landscape whereas a wide lens might shrink these elements and make it unclear what the subject of the photo is.
Following the rules
Never do this! Ok, sometimes do it but always remember that in photography the rules are made to be broken and this is how often you get a truly unique photo. Rule of thirds? Ignore it. Symmetry? Forget about it. The Golden Ratio… what’s that?
All these guidelines (and everything I’ve said above) are exactly that…guidelines. There are no hard and fast rules in photography, despite what some people might say so remember that even though sometimes going ‘by the book’ will get the best shots, other times the best shots will be had by doing the exact opposite!
It’s OK to break the rules!
Hopefully, some of that has been of use to you! If you enjoyed this post please consider checking out my Facebook page! If you have any more common landscape photography mistakes or tips then please put them in the comments below! Thanks for reading!
9 comments
Andrew Wright
The weather/sky advice is spot on. I tried some early morning shots recently, and the difference in lighting is incredible. Do you have any specific tips for balancing light in more challenging conditions, like midday sun?
Tom
Thanks for the comment! Midday sun can be difficult as can make everything look fairly flat or sometimes harsh and doesn’t have that nice warm feeling that sunrise/sunset gives. Not all light will be conducive to getting great pictures but generally:
– Shoot away from the sun (difficult in mid summer at noon as it may be directly overhead)
– Find something to break up the sunlight e.g. shooting under tree cover
– Focus on other things than landscapes, for instance macro photography for a change
Hope some of that helps!
Sarah L
Love the idea of experimenting with angles! I realised reading this I end up shooting almost everything from eye level. Definitely going to try getting lower to the ground for more interesting compositions.
Tom
Thanks for the comment and best of luck! I’ve started doing some drone photography recently so now I’m doing the opposite too and getting shots from higher up! :)
Helen
I have an old Kodak camera that I like but have bought a new Nikkon, I have rather good photos taken with the Kodak – the only problem is that the date is on each photo..and I don’t know how to delete them. Can you help here please?
Thank you
Tom Foster
I suspect that if the date is hard-coded onto each photo (is it always present on the image no matter what program you open it in) then it would be difficult to remove the date without some photoshop skills. Not impossible by any means but you’d need to use Photoshop (or similar program) to repair/clone the areas affected by the date!
Anonymous
Thank you, from a learner :)
James
These are some great tips. I think I had an abstract understanding of some of these concepts, but didn’t fully understand what I was trying to achieve. Having horizons straight is a good example of that!
I’ve been fiddling around with my iPhone a lot recently, and looking at (and loving) photos of Edinburgh from the 70s, 80s and 90s. I love a good photograph that captures a moment of what life was like at a particular period in time. It doesn’t even have to be anything special – just people in a street. It fascinates me.
With this in mind, and after reading your article, I think I’ve decided that I will indeed pursue this. Time to begin research on which camera I’m going to buy – because it’s happening. For sure.
Tom Foster
Glad I could have been of help! If I can inspire just one person to take up photography (or sway them into making that final decision!) then that’s good enough for me! If you have any questions then let me know! Best of luck on your upcoming photography adventure!